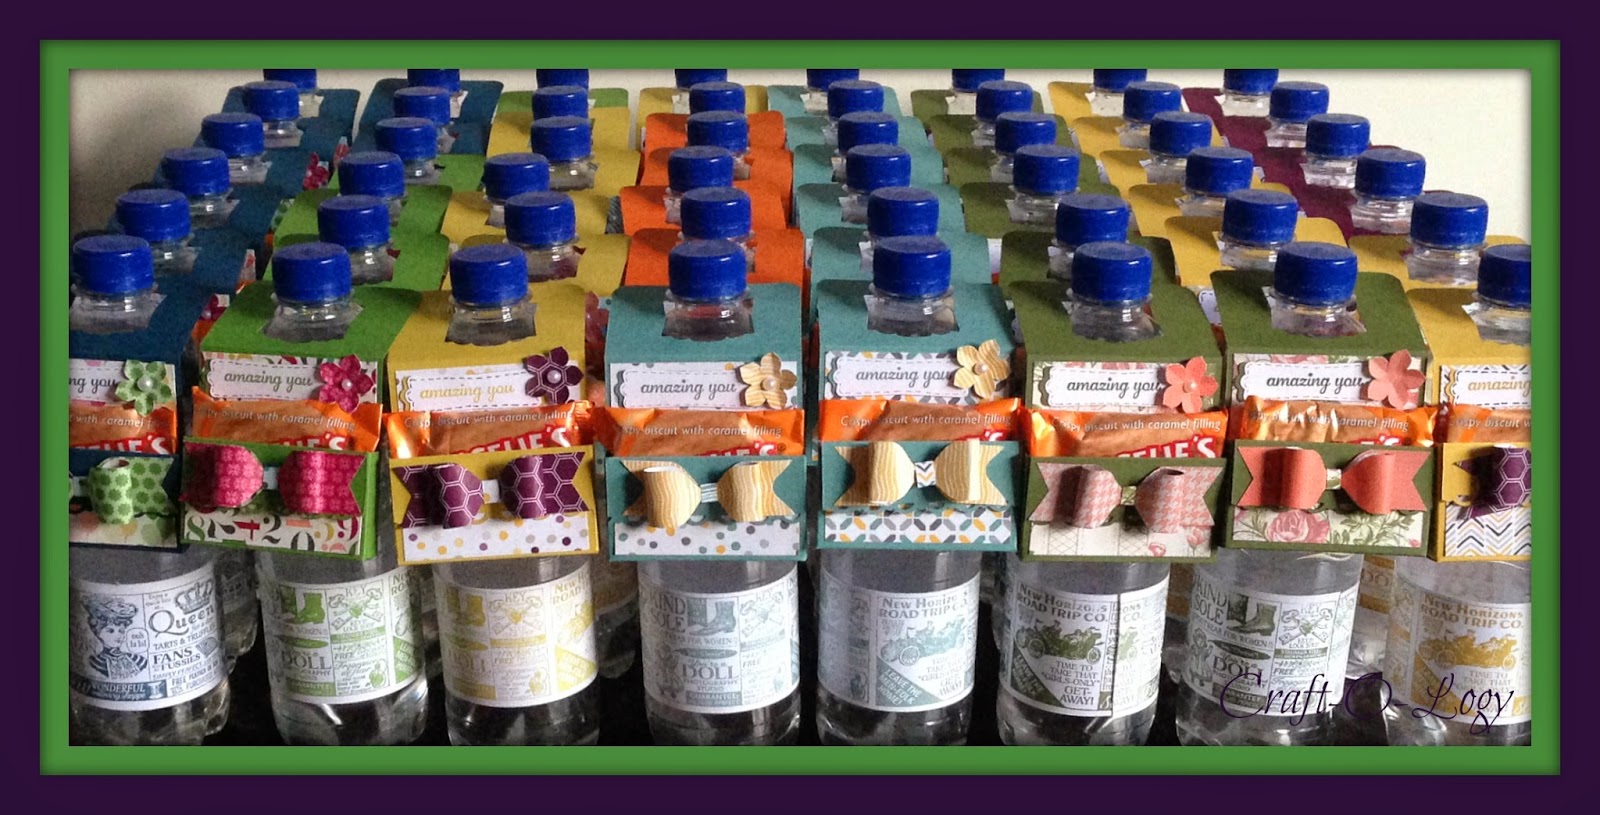
Gister had ik al enkele foto's gepost voor de swaps, die ik heb gemaakt voor de Stampin' Up bijeenkomst in Houten. De flesjes water met een Label Box gevuld met een koekje waren leuk om te maken, maar een stuk minder om mee te nemen! 50 Waterflesjes is toch best zwaar en onhandig om mee te nemen. En daar had ik natuurlijk geen moment overnagedacht! Met behulp van mijn hobbytrolley en een kratje is het toch gelukt en was ik al snel van alle flesjes verlost en een heleboel leuke swaps rijker!
Yesterday I posted some pictures of the swaps I've made for the Stampin' Up gathering in Houten, The Netherlands. The bottles of water with a Label Box filled with a cookie were fun to make, but a lot less fun to take a long! 50 waterbottles is a lot heavier and really hard to carry with you in a bag! And of course, I hadn't given that any thought at all! With the help of my hobby-trolley and a crate I did it and I've got rid of all the bottles in no time and I had a lot of fun swaps in return!
Tutorial Label Box for a Bottle
Benodigdheden:
- Cardstock:
Design Papier:
- 2 3/4" x 2"
- 2 3/4" x 1"
- 1/4 " x 1"
- 7/8" x 6 1/2"
- klein stukje voor het bloemetje / little piece for a flower
- Stampin' Trimmer
- Simply Scored Scoring Tool
- Envelope Punch Board
- Project Life Corner Punch
- Artisan Label Punch
- Scallop Trim or Scallop Edge Border Punch
- Petite Petals Punch
- Modern Label Punch
- Rhinestone Basic Jewel
- Sticky tape
- Glue Dots
1. Snij een stuk cardstock van 8" x 5". / Cut a piece of cardstock 8"x 5".
2. Het patroon voor de Label Box, de onderbroken lijnen zijn de scoringslijnen. De dichte lijnen zijn de lijnen waarlangs gesneden of geknipt moet worden.
The template for the Label Box. The closed lines are the ones for cutting, the dashed ones for scoring.
3. Score het cardstock aan de korte zijde op: 1/4", 3/4", 3 3/4" en 4 1/4".
Score short side of cardstock: 1/4", 3/4", 3 3/4" en 4 1/4".
4. Score het cardstock aan de lange zijde op 2", 5", 5 1/2", 7".
Score cardstock on long side: 2", 5", 5 1/2", 7".
5. Snijd of knip de zijkanten weg, zoals op de foto (op het patroon zijn dat de dikke lijnen).
Cut sides. like on the picture. (the closed lines on template).
6. Rond de hoeken van het cardstock aan de bovenkant af met de Project Life Corner Punch.
Punch the corners of the cardstock on the top with the Project Life Corner Punch.
7. Gebruik de Artisan Label Punch voor de opening waar het label mee aan een fles gehangen kan worden.
Use the Artisan Label Punch for the neck of the bottle.
8. Pons onderste rand met de Scallop Trim of Scallop Edge Border Punch.
Punch the under side of the cardstock with the Scallop Trim or Scallop Edge Border Punch.
 |
| In Colors: Blackberry Bliss, Gumbal Gree, n, Hello Honey, Lost LagoonMidnight Muse, Mossy Meadows, Summer Starfruit, Tangelo Twist |
Vijftig templates! Ik had de Label Love stempels gebruikt om de Artisan Labels te ponsen. Ik vond het wel zo handig om een heleboel gestempelde labeltjes te hebben in plaats van een heleboel lege labeltjes, die veel lastiger netjes te stempelen zijn, nadat ze zijn uitgeponst!
De nieuwe In Colors, die ik echt helemaal super vind, heb ik nu ook weer gebruikt, maar ook de oude In Colors van 2012-2014 zijn terug te vinden in deze Label Boxen.
Fifty Templates! I used the Label Love stamps before I punched the Artisan Label. I found it handy to have a lot of stamped labels instead of a lot of empty labels.
I really love the new In Colors! And I have used them again for this project. I also used the old In Colors 2012-2014.
9. Vouw de Label Box in vorm en plak het vast met sticky tape.
Fold the Label Box and use sticky tape to close the box.
10. Snijd van Design Papier / Cut Design Papers:
- 2 3/4" x 2"
- 2 3/4" x 1"
- 1/4 " x 1"
- 7/8" x 6 1/2"
11. Plak de stukjes van 2 3/4" x 2" en 2 3/4" x 1" op de Label Box.
Glue 2 3/4" x 2" & 2 3/4" x 1" pieces of Design Paper on the Label Box.
12. Pak nu het stukje Design Papier van 7/8" x 6 1/2" en 1/4" x 1" en maak daar met behulp van Envelope Punch Board een strikje van.
Take piece of Design Papier of7/8" x 6 1/2" & 1/4" x 1" and use the Envelope Punch Board to make a bow out of it.
13. Pons een bloemetje met de Petite Petals Punch, breng diepte aan met een scoring tool en versier dit met een Rhinestone Basic Jewel.
Punch flower with the Petite Petals Punch. To ad some depth use a scoring tool and decorate with Rhinestone Basic Jewel.
14. Bevestig het strikje met Glue Dot.
Attach bow with a Glue Dot.
15. Pons een label uit het gekleurde cardstock met de Modern Label Punch en knip dit door midden.
Punch a label from the colored cardstock with the Modern Label Punch and cut in half.
16. Stempel een sentiment op Whisper White Cardstock. Pons deze uit met de Modern Label Punch.
Stamp a sentiment on Whisper White Cardstock and punch it with the Modern Label Punch.
17. Teken een stikrandje met een Stampin' Write Marker langs de rand van het modern label.
Draw a stitch border with a Stampin' Write Marker around the edge of the modern label.
18. Plak de twee halve labeltjes achter het witte labeltje en zorg dat er aan beide zijde van het witte label een gekleurd randje zichtbaar blijft.
Glue the two halves of the colored label on the back of the white one. This way, there will be a colored border on both sides of the white label.
 |
19. Plak het labeltje en het bloemetje op de Label Box.
Glue the label and the flower on the box.
|
20. En het doosje kan gevuld worden met een koekje of een cadeaubon.
Now you can fill the box with a cookie or a gift-card.
 |
De gevulde doosjes voor de swap.
Filled boxes for the swap. |
 |
De gevulde doosjes voor de swap.
Filled boxes for the swap. |
 |
De gevulde doosjes voor de swap.
Filled boxes for the swap. |
 |
De gevulde doosjes voor de swap.
Filled boxes for the swap. |
 |
De gevulde doosjes voor de swap netjes en veilig opgeborgen!
Filled boxes for the swap nice and safely in crate! |
 |
De etiketten van de flesjes afgehaald en de gestempelde etiketten er weer opgeplakt terwijl ik zat te genieten van de geweldige prestatie van het Nederlands Elftal tegen Spanje: 5-1!!!!!!!!!!!!!!!!!!!
I took off the labels of the bottles during the game of the Dutch soccer team. I really enjoyed it!!!!!
Netherlands vs Spain 5-1!!!!!!!!!!!
|
21. Haal het etiket van het flesje af. / Take the label of the bottle.
22. Rol met de Stampin' Around Handle en de Shop Around een etiket voor op het flesje. Ik heb gewoon printerpapier gebruikt, omdat dat het makkelijkst om het flesje ging. Zet het vast met wat lijm.
Use the Stampin' Around Handle and the Shop Around for the label on the bottle. I used plain white paper, because that was the easiest to wrap around the bottle. Secure with some glue.
23. Als laatste hang je de Label Box om je flesje!
The final thing to do is: hang the box around the bottle!
Have Fun & Enjoy!
Eveline


